School Mamagement Software Full User Guide
Available with Live Video Explanation Links
Download Software & Start Operating it Now...
User Manual Guide
===
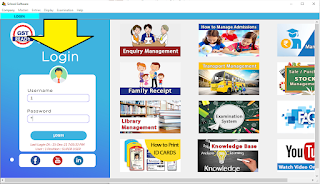
** Login Page.. **
* Install School Software & Support Setup First
* Double Click on "School Software" icon to Start
* "Create New Company"
* Type the School, Name, Address, Financial Year Range
* Double Click on company to start.
===
Other Utilities on Login Page
* You can Create Multiple School Accounts in Single Software
* F4 : Set Database Path > Manually set software path if required
* F5 : Take Back up Manually
* F6 : Restore Old Data if Required from Back up Files
* F8 : Change Session :: Automated Session to Transfer Students data in Next Academic Year with Standard Upgrade & Old Fees Balance Carry Forward.
Self Access Guide Tool, Check Live Video how to this Process.
* F7 : Other Settings
* Double Click On School Name on Screen & Start Software Now
* Default User ID = 1
* Passowrd = 1
You can change the uesr ID & Password from Software anytime from User Master.
* Press Login Button & Enter the School Management Software.
* After Press Login Software Operational Dashboard will apeear on screen
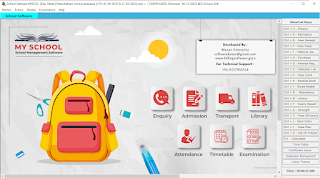
* Software Dashboard Main Entry Screen
* All Frequently Master can be opened from Icons Directly
* Same way Transactions Like Fees Receipt, Attedance can be opened from Icons
* Frequently Used Reports in School Software is also available on same Dashboard to analyse data easily with required daily reports.
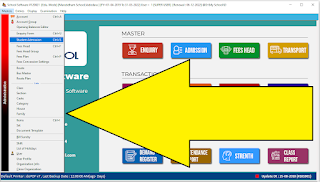
** Master Menu **
* Account
* Account Group
* Opening Balance Editor
-------------
* Enquiry Form
* Fees Head
* Fees Head Group
* Fees Plan
* Fees Concession Settings
* Route
* Bus Master
* Route Plan
### Learn Masters Entry Live on Video ###
-----------
* Class
* Section
* Caste
* Category
* House
* Family
-----------
* Items
* Set
* Document Template
---------
* Bill Sundry
* Shift
* List of Holidays
* Uer Master
* User Profile & Rights
* Organisation Information
* Close Organisation.
Let's Start Software Detailed Master & Entry Screen User Manual Now
=====
** Student Admission **
* Lets Start with Student Details data Entry
* Admission :: Main Entry Screen of School Software.
* Click on Admission Button to start
* Click on "New" Button
* Student Data Entry will start from here
* Start with Student GR No. as Admission No. inSoftware
* Name of Student
### Every Master has Plus & Pen Button to Create or Edit the Master from Entry Screen itself.
* Standard : Select Student Standard from list, Press Plus to create New or Pen to Edit Existing data in the list
* Saction : Select Saction of Student
* Route : Route is Related with Transport Facility, we can create School Bus Charges in Route Master.
Route - Bus Master - Route Plan.
* Bus No. : Select Bus No. of Same Route Creaed in Bus Master. Student Fees Charges will be applied according to Route Plan Selected.
* Caste : Select Student Caste (If Required)
* Category : Student Category Related with Fees. Ex. RTE Students will have discounts on reguler Fees. This Category Selection will be available while mapping Student Fees Plan.
* House : Some School Maintain House Structure to bifurgate Students Events more interactive & Compititive, Make & Map the data here with Student.
1. BASIC DETAILS
* Student Address : Address Line 1 & 2, City, Contact Nos., DOB Etc.,
* Student Parents Name & Contact Nos., DOB Etc.,
* Parents Anniversary Date & E Mail ID Details
*** Student Photograph ***
* Just Click on Student Image Icon, Select jpeg image from Computer Hard Disk and Save Photo of student. This will print in Student ID Card Automatically.
2. OFFICIAL INFORMATION
* Fill the Students Previous School Details
* Studnet Vital Data like Blood Group, Etc.
* Student Certificates Colledted while admission Like CC, TC Etc.,
* Student Last School Acedemic Records
* Studnet Active / DIs Continued Status Selection Etc.,
=====
** Student FEES **
Watch Live on YouTube ::
* Software Menu > Master > "Fees Head"
* Fees Heading
* Account Name : Select Fees Head Account Name which is Created in Account Master
* Group : Select from Student Group list
* Frequency : Select Fees Commection Frequency from List available.
Annual/ Half Yearly/ Quarterly/ Monthly Etc.,
* Select Month Name from List as per Frequency Plan Selected.
* Update : Save ::
* Saved Data will be available as a list in footer area of the same screen. Just Double Click on it to Edit the Data.
* Software Menu > Master > "Fees Plan"
* Select FeesHeading : List Selection which is created in "Fees Head" Master
* Fees Value : Type the Students Fees as per Plan Creating with Selective Standard & Caregory of Student.
* Choose Class : All Standards created in Master will be displayed here. Select the particular Standard as per Fess Plan
* Choose Category : Select from List of Student Category created Ex. RTE, STBC, Etc., Fees will be applied according to Standard & Category of Student Selected. You can select multiple Choices here for same Fees. Ex. Std. 4-5-6 have same Fees for all General & STBC Studentes then you can choolse all at a time here, no need to creat one by seperate entry. Software will generate seperate record of all standards & Categories. Please Make Sure that you create different category of Students only if their fees Structrue is chaging otherwise no need to create different categories.
* Save : All Saved data list available in footer area. You can double click on any record to edit or delete...
* Filter any data in list by typing Fees Head, Class, Category or Fees Value in Footer Area.
* Software Menu > Master > "Route Plan"
* Route Name : Create New Route of Bus Etc., Ex. MG Road, or Route No. 1 Etc.,
* Frequency : Select Fees Collection Frequency
# This will be clubbed up in students total fees while taking Fees Receipt, How ever you will be able to map reports seperately for pending fees of particular Bus.
* Check Box Month Name : Select month name as per Frequency Plan Selected.
* Save : All saved list will be available in footer area.
## Double Click on specific Route Heading in list to Edit or delete the Data.
$ Please note that any edit or delete will not effect the existing saved transaction, but will effect on next transaction. Any master would not allow you to delete if there is any single entry is done.
* Filter list data with "Route Name" or "Frequency" available in footer area.
*** CONFIGURE STUDENT WISE FEES CONCESSION ***
* Software Menu > Master > "Fees Concession Settings"
* Enter Admission No. : Student Admission No. Entered into software.
* or Press F4 Button : to search any student by their Father Name or Standard Etc.,
* All Student details will be displayed after selecting particular student name
* Fess Value : Display as per Fees Plan
* Concession % & Amount : Type Percentage or Amount of Concession
* Actual Value : Figure displays automatically
* Reason for Concession : Type text manually.
* Save : List will display of all saved data in footer of the same screen.
* Just Double click on any student name to edit or delete record
* Filter student data list with Adm. No., Na,e, Class, Reason Etc. wise from Footer area Filter text boxes.
* Close : Press Red Cross Button on top Right or Esc to Close the screen.
=====
** Entries Menu **
* Software Menu > Entries
* Misc Fees Receipt
* Material Issue
* Stock Purchase
* Gatepass Management
* Document Issue
* Demand Bill Printing
* Attedance
* Time Table of School
* Certificates
* Financial Accounting
* Quick Payment
* Quick Receipt
* Bank Entry
+++++++++++++++++++++++++
=====
** Fee Receipt Entry **
Watch Live
* Software Menu > Entries > Fees Receipt (ctrl+R)
* New : Press New to Start
* Date & Receipt No. will display autimatically
* Admission No. : Search Student either by Number or
Press F4 : to Filter student Name, Standard, Section wise
Once you select Student, Full Details of Student will display on screen
* Month : Select Month of which you want to collect fees for..
* Detail Section will display Fees of Student to collect "Fees Head" & Selected Monthwise
* Total Fees : Footer Section will display total fees to be collected, includes : Tution Fees, Admission Fees, Transport Bus Fees whichever is configured for that student in Fees Plan with Concession Amount.
* Receipt Amount : Type the fees receipt amount. Press Plus Button if Fees is given in other than Cash Mode. You can Create Bank Account for Credit Card, Wallet Linkd Bank Accounts from Account Master. Receipt Amount of Fees will be transferred to particular selected ledger automatically. You can select multiple tender in one fees receipt too..
* Balance : If Fees Receipt amount is less than total amount, Balance amount will be displayed on screen. which further will get printed on fees receipt. Also Balance fees will pop up when student comes again for fees payment. If Student Year Closing Activity is carried & carried to next year, Balance Fees will be carried forward to next year by default. You can Edit this Balance Manually in Student Admission Master Next Year Screen from "Opening Balance" Field.
* Save : Press Save button to save data.
* Print : "So you want to print?" Press Yes to Print the receipt.
In Modern Updated software, you will find Preview of receipt, from which you will be able to whats app the pdf copy of receipt to parents immediately confirming the payment receipt of fees.
* Remarks : Any detail you want as narration can be described here. (Can be printed in receipt if required)
* EDIT / DELETE : Fees Receipt Register : Any Fees Receipt Report of Software is enabled with Zoom In Zoom Out Utility. If you want to edit any fees receipt data, just double click on specific recepit from any report, The same entry will open in fees receipt entry screen ready for editing mode. Press "Update" Button to Update the Edits made, or Press "Delete" button to delete the entry.
## Family Receipt Entry ##
This Feature is Basically for those Parents whose more than one kid study in same school. School management can map that student as single family & manage their fees balances according to family name.
## Misc Fees Receipt ##
Other than school acedemic Fees, Food, Transport there are lot many other reasons for which school needs to collect money from Parents. A receipt is always required for any money collected. So this module will proive those entries into account with receipt prints.
=====
** Library Management **
** Library Management Software is also available seperately **
** My Library : Inbuilt Module in School software to manage Inventory of School Books collection for student to read as reference, & return it to School once its Done.
* This Software will have All features which a Library requires
*** Features of Library Management Software ***
* New Book Entry > Type Name of Boo, Title, Author Name, Edition, Barcode ISBN Mapping & other required details with numbers.
* List of Books > All books stored in software will have list, we can even export those data into Excel.
* Filter Book : Search any book by Name, Title, Author, with Text section in Header of the entry screen.
* Issue Book > Search for any student studying in the school, Select particular name, assign specific Book required with return Date.
* Receive Book > Collect back the issued book to student. will audit the day of issue & Due date while taking back the Book. The Receive Book entry will add the Stock of Book again into Library.
* Book Issue & Receive Register > Special report available for Books issue & Receive seperately for audit purpose.
* Book Ledger : Report will give information of specific selected book, for How many students took it with date records.
* Pending Books Report : The list of books which students dont prefer to read.
* Print Sticker : You can print your own Barcode Based Label for your book, that will make book search job more easy while issue & return.
* Import & Export to Excel : All Books list can be imported & Exported to excel with this Feature.
* Available - Issued Books Check Boxes : This feature will make book search more advanced that the searched book is available in shelf or not with available no of books.
* Print : All list of books with filtered condition can be printed anytime from same screen.
* Material Issue
* Stock Purchase
* Gatepass Management
* Document Issue
* Demand Bill Printing
=====
** Attedance **
* Software Menu > Entries > Attedance
* New : Start New Attedance Entry
* Screen will display selected date All Standard Attedance Summary
* Press Edit Button beside to audit any back date entry
* Attedance Entry How to do?
* Select Date (Default is Current date)
* Select Class / Standard
* Select Section
* Press OK
* List of Student will be displayed.
* Tick Mark on Present-Absent-Leave Student with Remarks note if any
* Save
* Close.
* Software Menu > Entries > Attedance >Summary
* Summary Button will Show Report of specific student datwise
* Type the Studenr Admission No., Select date range you require
* Report display will show Present, Absent, Leave Details Ready to print.
* Footer area will show total summary of Present & Absent Days During the time period selected.
# Attedance Module have all entry screen & Reports in One Module. However if you want to print ttal precense days on final marksheet, that can be configured in Crystal Report design.
=====
** Time Table **
* Software Menu > Entries > Time Table
Making Time Table of school has few Master Data Entries to configure. We have different Entry Screen for that. Eg.,
1. Assign Periods : Select Class > Section > Total Periods in a day > Save.
2. Subject Master : List the Name of Subjects to be taughts in periods. Eg. Maths, Science etc.,
3. Teachers Subjects : Create New Teacher First. Then Just Double click on Teachers name in list & Select the Name of Subject the teacher is going to teach in school.
4. Teacher's Period : Teacher Name > Day of the week > Class > Section > Period No. > Subject > Save. Enter data of multiple prriods of specific teacher in different days of the week.
:: REPORT ::
Teacher wise time table :: Select any teacher name from list & Press OK. Display result of specific teacher's full weekly timetable period No wise with subject name.
Class wise time table :: Select Class & Section : OK : Displays weekly periods of specific class with teacher & Subject Name.
=====
** Certificates **
* Software Menu > Entries > Certificates
Different documents & Certificates requires to print in any school during acedemic year activity. Billing Software guru's School Software provides totally flexible & customizable certificates templates ready to use, which needs to be printed frequently. Here is the list of documents...
@ School Leaving Certificate
@ Student Certificate
@ Entrance Test
@ Teacher Certificate (Laving)
@ Teacher Certificate (Present)
& other certificates if required...
=====
** Stock Management **
Every School has few inventory to manage. Eg. School Bags, Students Books, Notes, & other stationeries to distribute or sales purpose. Billing Software guru's School software will give module to purchase these Stock in Numbers, Stock Issue to student & Payemnts if any. Entry Screen will then lead to Reports which gives balance stock data to analyse.
Three Parts of Stock Management in School Software
1. Master of Item, Set
2. Stock In & Out Entry Screen
3. Reports to analyse
1. * Master of Item & Set :
Item Master
* Software Menu > Master > Items (ctrl+I)
> Item Name
> Company
> Rate
> Opening Stock While Entry
> Save
>>> Same screen will show list of items entered. Double CLick will allow to edit or delete entry made if not made any transaction of that item.
Set Master
* Software Menu > Master > Set
> Enter Set Name : Eg. STD 10 Books, Nursary Stationery Etc.,
> Item Name : go onselecting items from list with Quantity required in particular set to deduct & Apply specific Rate, Press Add Item, will allow to add next otem in the set list.
> Save :
> List of saved Set will display on right. Just double click on it to Edit or Delete.
2. Stock In & Out Entry Screen
* Software Menu > Entries > Material Issue & Stock Purchase
* Stock Purchase (Ctrl+o) :
> New
> Date of Purcahse
> Supplier Name List of Selection or create new with F3
> Select Item Name
> Type any remarks
> Qty : Quantity Purcahsed
> Rate : Product Price
> Amount : Automatic Calculation
> Other Charges : Add or less any charges in invoice if any
> Save : Save the Purchase Invoice will add the Stock of Items & send Invoice amount in to supplier's account ledger.
* Material Issue (Ctrl+t) :
> New
> Bill No. : will display continuous numbar automatically
> Admission No. : Student Admission No. or Search Student by name or other details by click on search button beside
> Set Name : Select from Selection List. (you can create a set with F3 Button, Eg. Std 10 Books Set. So that you dont need to enter all stock of books for each student every time.) if there is no set, just skip this field.
> Item Name : Select from list
> Qty : Type Numbers to issue
> Rate : Price of Item
> Basic Amt : Automatic Calculation Qty x Rate
> Dis % & DIs Amt : DIscount Percentage if any
> Net Amount
Go on adding the items to issue to same student.
> Other Charges : Add or Less any other charges apply to bill
> By Default the Bill amount will go into Cash Ledger, Still you can Edit Receive Amount & collect credit Amount later from Quicj Receipt.
> Save & Print.
3. * Stock Analysis *
Display > Stock Report >
1. Material Issue Register
2. Stock Purchase Register
3. Stock Register
# Stock Register will have Ledger of All Items total In & Out with Balance Values. Same report can be filtered Item Name wise or company wise, Zero Stock can be filtered too..
# All Reports will have Date Range selection & Print Utility with Export to Excel.
=====
** Examination **
School Software of Billing Software Guru includes Full Solution for Students Examinations & Marks. Starting from Small unit tests to Term Exams & Final Examinations, Software have utility to enter all tests marks student wise, Standard wise, Subject wise.
Marksheet generates automatically after entering all marks as per configuration Percentage or grade system wise.
:: Here is the List of all modules ::
* Report Card
* Marks Entry
* Mark Sheet - Individual Student
* Mark Sheet - Class wise
* Term Master
* Assessment Master
* Class Wise Subjects
* Grading System Setting
* Term Grading System
* Report Card Setting
====
** Reports **
Software Menu > Display
Display Fitst Saction have Different Accounting based Reports & Lower Section has School Fees Related Reports.
Below is Few Screen Images of Fees Related Reports to Analyse.
* Software Menu > Display > "Fees Day Book"
* Software Menu > Display > "Defaulter's List" > "Reminder Letter"
* Software Menu > Display > Fees Dues List > "Fees Dues Classwise"
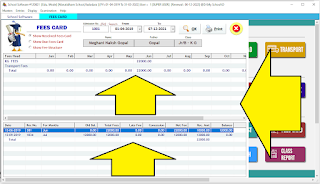
* Software Menu > Display > "Fees Card" (Ctrl+h)
* Software Menu > Display > "Class wise Strength" (ctrl + x)
* Software Menu > Display > "Class Report"
=====
** Settings **
> Register Now
> Birthday Reminder
> Annual Renewal Charges (ARC) Info
> Report Builder Tool
> Developers Corner
> Calculator
> Additional Fields
> Reset Financial Year
> Options (Settings of Software)
> SMS Templates
> Timeline
> Remove Null...
********************
****************
Thank You.


