A Perfect software to manage any Educational Institute Students data.
Best Useful for Institutes who needs to manage
1. Students Data
2. Inquiries & Admission Conversion
4. Student ID Cards Printing
5. Attedance
& More
:: Download Demo Version of Software Now ::
!! User Manual !!
* Login Screen *
* Download & Install software as shown in video
* Create New Compay
* Type the Required details, can be edited anytime
* Login into Company created
* Default User ID & Password is "1"
* Check Software Dashboard
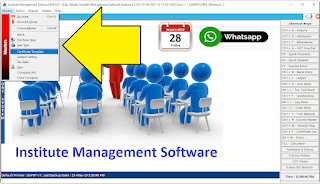
* Top Left Software Menu List
* Right Side Panel - All Most Used Screen Shortcuts to operate
* Software Main Menu List *
# Masters
# Entries
# Reports
# Utilities
* Master Menu List *
***********
- Account Master
- Account Group
- Course Master
- Batch Master
- Certificate Master
- Subject Master
- Tax Slab
- User Master
- Company Info
- Close Company.
* Entries List *
@ Enquiry
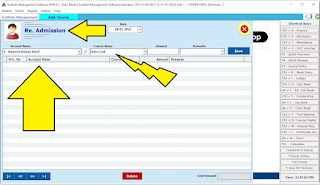
@ Re Admission
@ Journal (JV Entry)
===
** Admisssion **
:: Let's Start with Student Admission ::
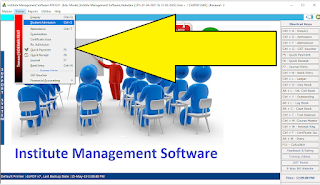
Software Menu > Entries > Student Admission
* Date Range : Select to Filter data of Student as per course timings
* Check Box for Filter
1. List of Discontinued Students
2. Course Completing within
3. All Installments Received.
* Export - Import : You can Export Filtered Students List to Excel & Same Sheet if you enter other Name can be imported into software.
* ID Card : We can Print Student's ID Card from selected List of Students
* Labels : Students Address Labels & Other Customized Details Printing Labels can be generated from here
* Adm. Form : Admitted Students Admission Form can be Printed from here to maintain Student's Signature Hard Copy for Record. We can Customize this Form in Crystal Report as per our institution Requirement.
SMS : Busk SMS to Students
Search :: Important Filter Button to view any conditional list with any field of student details like City, Area, Etc.,
:: New :: Click on New Button to Enter New Students Data into Software after Admission here.
* Entry Date
* Admission No
* Course Name (Select from List available or Creae New with Plus Button Beside or Edit with pen button)
* Roll No.
Basic Details of Students
* Student Name, Parents Name, Occupation, Wualification Etc., Enter as per requirement, Skip if Not Required by Pressing "Enter Key" from Key Board.
* Date of Birth, Biometrix / RFID No
* Stream
* Gender Selection Radio Button
* Address Details
* Batch / Timing Selection
* Date of Admission & Course Completion Date
* Course Fee Committed
* Discount Offer
* Student Photo Selection with Click on "Click here to Add Photo" Will take you to Windows explorer.
* Status : Active _ Dis Continued Select as per status.
Press Save Button to Save Data, Double CLisk from Student List to Edit or Delete the Data.
Close : Esc or Close Button for Exit from screen.
* If Student is Discontinued and again coming to Institute fro same ot some other course to join then we can use this Re Admission Screen.
* Re. Admission will Provide access to select another Course to join with New Course Fees..
===
** Attedance **
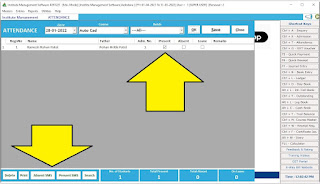
Software Menu > Entries > Attedance
* Attedance Manager is Very useful screen to manage student's Daily attedance and hance monthly or selective period report and important document for Analysis of Student's Total Attedance during the Course Period offered.
* Screen provides very access and operatin to maintain student's Attedance.
* Main Attedance Manage Screen will provide the Report with Date Selection and total summary of student's presence & absence with leave Notes if any. Edit the specific date report is also available here.
Click on "New" Button to start entry of Student's Attedance in specific Batch of Course as per below screen explained.
* Select Date - Default date is System Current Date
* Course : Select from Lsit
* Batch : Select from List
Press Enter Key to Proceed with OK
* List of all students will appear on screen. Just Tick Mark on "Present", "Absent" or "Leave" as per students Status in Class room.
* Save : Save Button will save the Batch Record for the day. You can SMS all these Student's Parents at a time with single click provided below the screen for present & Absence SMS with Predefined Text.
* Close : Press Close ot Esc Button to Exit from the screen.
===
** Fees Receipt **
Software Menu > Entries > Quick Receipt
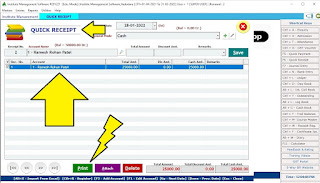
* Every Student Admission is associated with Course Fees. Software is Designed to keep record of Student's Fees Paid & Pending Report with Fees Receipt Print Utility at the time of paying fees to institute.
Date : Select date of Fees been received from student
Payment Mode : Select Cash / Bank Name in Case of Student Pating Online or through any app like G Pay, Phone Pe, PayTM or other UPI. Just Select the Bank Name from list which is associated with the specific Wallet UPI. Create New Bank with Pressing Green Plus Button Beside or Edit the same with Pen Button Beside. You can Create New Bank Account
Go on Pressing Enter Key on Key Board to Progress further
Receipt No. : will display automatically.
Account Name : Select Studenr Name from list
Total Amount : Type the amount of fees to be received
Discount Amount : Skip or type if needed
Remarks : Type any narration if required.
Save : Save the Receipt.
Now How to Print Receipt?
Just Select the Entry Made with Right Mark on Check Box
Press "Print" Button Below on Footer of the screen
Message will display for print or preview.
Any printer will print the receipt which is system default printer.
Check the Image Below
* Above Copy is Print Preview of Fees Receipt
* We can Print or Whats app pdf of this receipt to student immediately
* We can Customize this Receipt totally. Can Print Color Receipt, Logo can be inserted and even if you have printed lated[ad of your institution, it can print on the same skipping the institute details header.
* Close or Esc to exit from the screen.
===
** GST Voucher **
Software Menu > Entries > GST Voucher
* GST Voucher screen is available to maintain general purchase, expense, entries with GST Tax effects.
Plesae Click this Link Video for details how to use this screen.
===
* Expense / Payment Entry *
Software Menu > Entries > Quick Payment
* As Institute Management Software has all features maintaining Accounts We have Seperate Screen for any Payment to be made as Expense or assets purchase documents entry.
* Software will allow to enter any salaries made to faculties or other persons in organisation through this window thus maintains all expense made.
* Expense from Payment Screen & Income from Fees Receipts made will manage almost all needs of accounts.
* Quick Payment Screen we can enter all cash & Bank Tansactions made. Create New Expense or Salary Account from Account Master (ctrl+A) screen.
===
* Bank Entry *
Software Menu > Entries > Bank Entry
Bank Entry screen in Institute Management System software is used for Contra Entry where you have to deposit Cash or Withraw Cash from Bank or need to Transfer Money from your Own Bank account to Another. Please Watch Below Video for How to do Bank Contra Entry in to Software Live.
BANK ENTRY LIVE TRAINING VIDEO

You can Create New Bank from Account Master
===
* Examination *
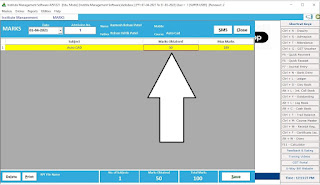
* If your Institute needs to have Marks for the Subject course offered for measurement goal of students than this is the screen useful for you. A very basic entry level screen is given in this software which can store data of marks obtained by students for specific course.
* You can Save, Delete or Print the Marksheet entered into software.
===
* MIS Report Analysis *
Software Menu > Reports > Account Books
* Lot Many Reports are available to analyse accounts and other details entered into software related to institute.
* Eg.
Payment Register
Receipt Register
Ledger
Profit & Loss
Outstanding Analysis
Etc., Check Above image for detailed list of reports supplied with our institute management system.
===
* Certificates Issue *
Software Menu > Entries > Certificates + Document Template
Check Below Image for Customizable Certificate Template
Generated from Software.
* Create First Document Template from Master Screen as shown in Below Image.
* Then Select Certificate Tempate :
* Select Student Name
* Type the Details you want to.
* Press Save Button.
* Make Certificate Templates.
* Select any rpt file you have designed to print as certificate on your institute laterpad
* Column Name & Default valu can be entered as to print on Certificate.
Press Save Button.
Thank You for reading our Blog!
Please Downlad Institute Management Software from Below Link for Demo Purpose
You can Whats app us @ 9727955514 for More Details or Personal Help if Required.
You can Pay us Online for the software & we will support personally through Anydek / Team Viewer Remote Desktop Software.
Thank You.


